GitHubのインテグレーション
GitHubをRetoolに接続します。
1. GitHubアプリの作成
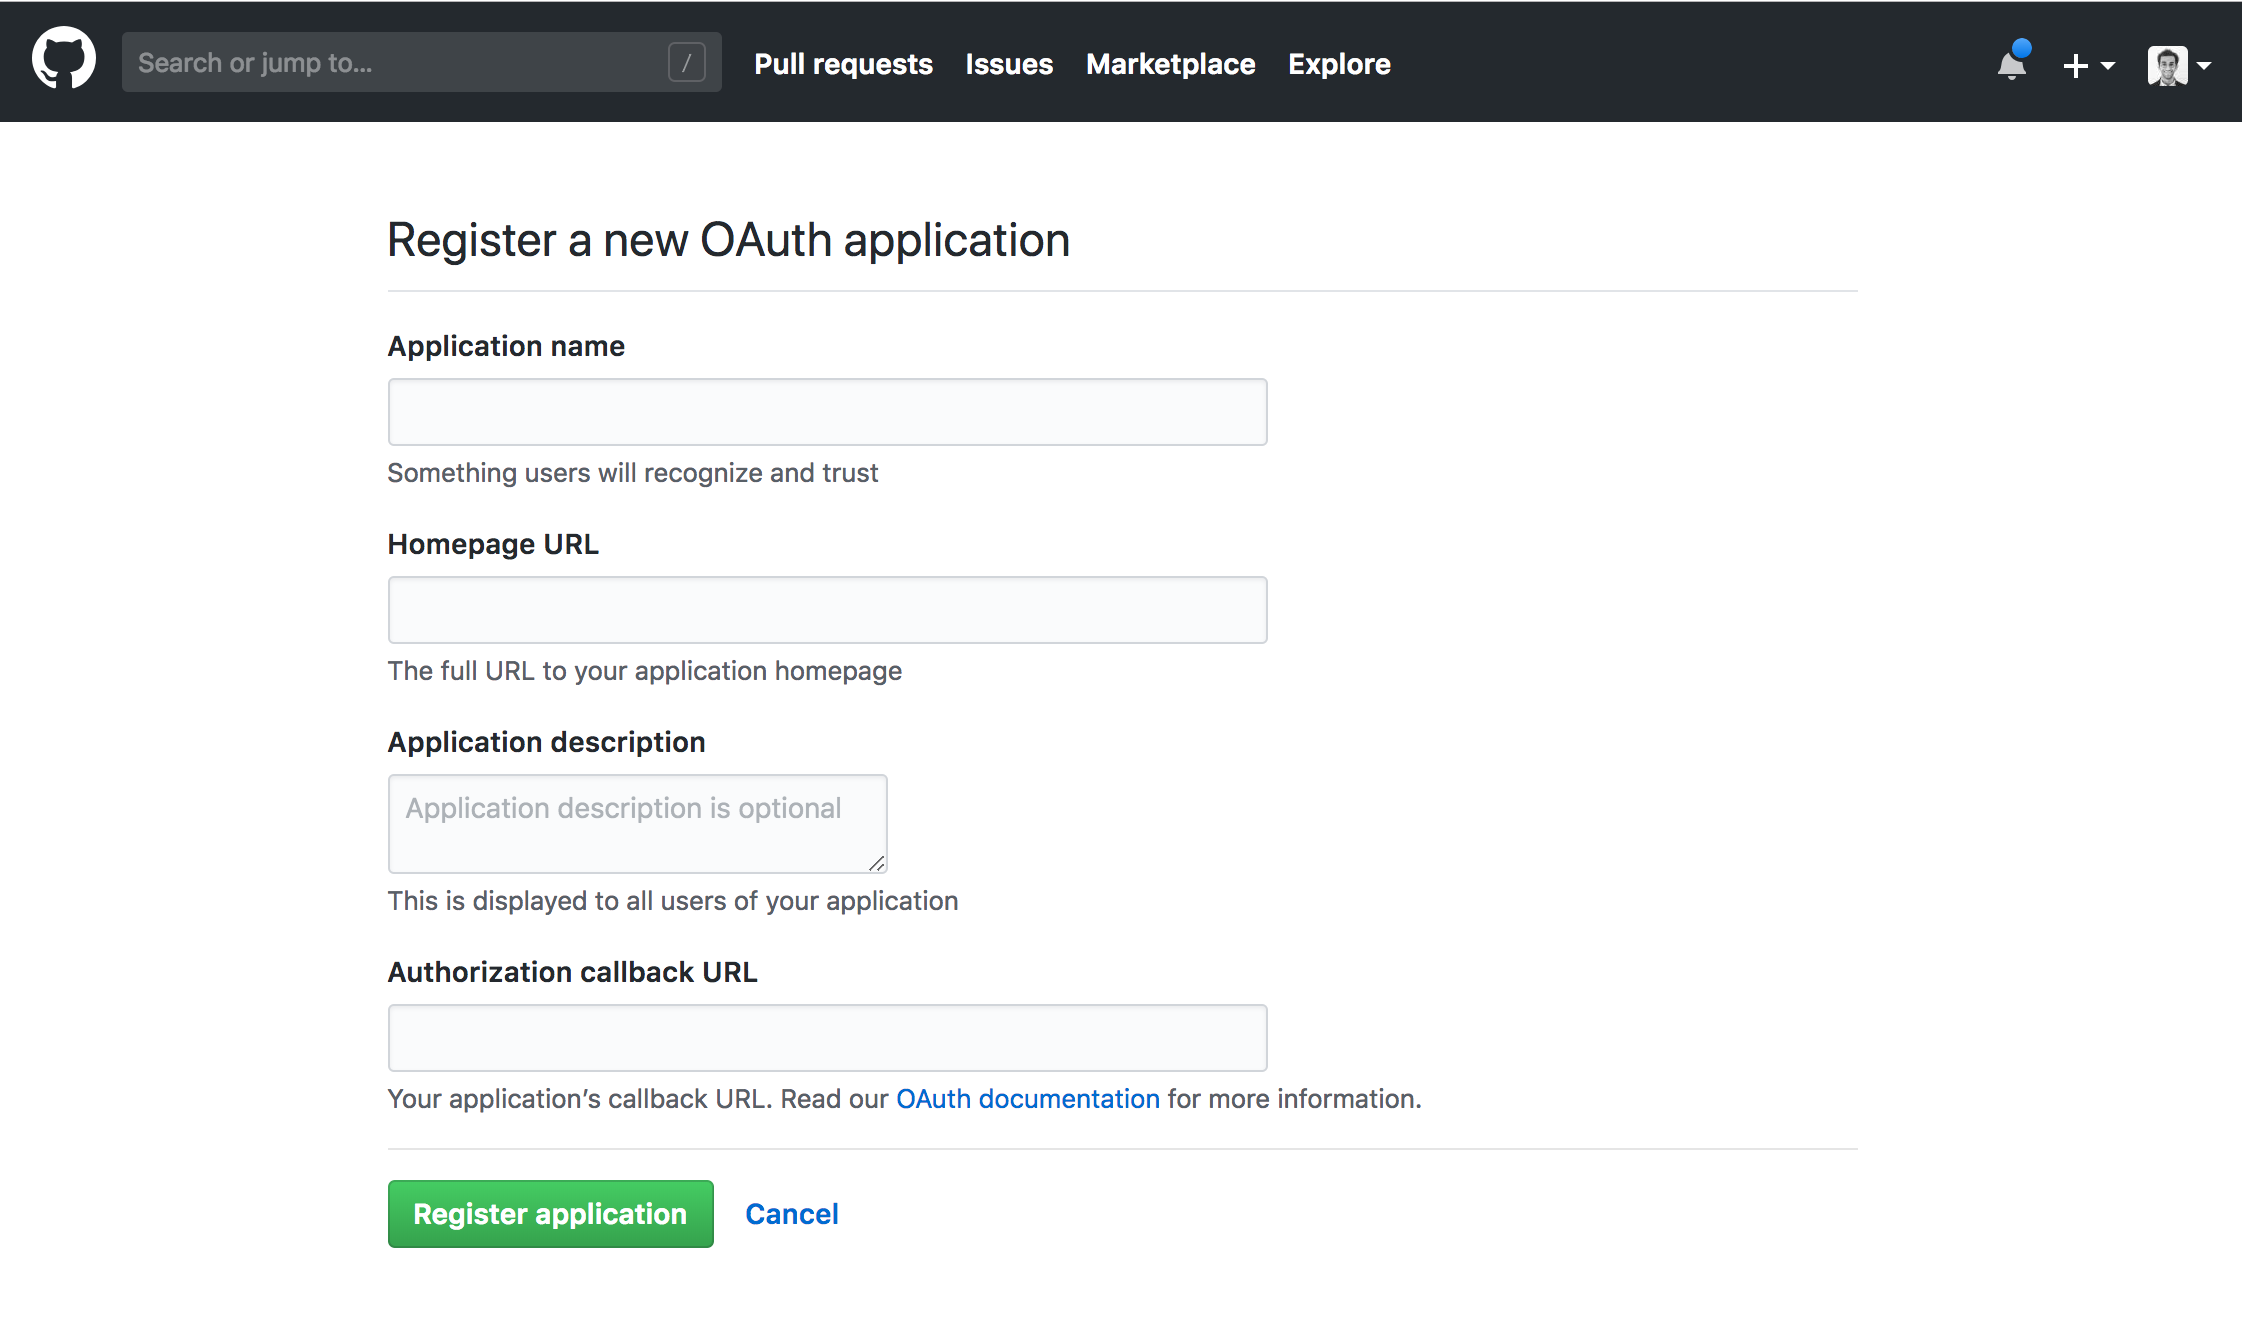
まず、RetoolアプリをGitHubに登録する必要があります。アカウントの「Settings」ページの「Developer Settings」セクションで、新規OAuthアプリを作成します。
「Authorization callback URL」にhttps://oauth.retool.com/oauth/user/oauthcallbackを設定します。このURLは、Retool内に新規GitHubリソースを作成したときも表示され、コピーすることができます。
[組織が古く、tryretool.comのサブドメイン(company.tryretool.comなど)にいる場合は、その代わりにURLとしてhttps://oauth.tryretool.com/oauth/user/oauthcallbackを使用する必要があります。]
Settings > Developer Settings > OAuth Apps > New OAuth App

2. GitHubアプリの資格情報の取得
GitHubアプリの「Settings」セクションに入ると、Client IDとClient Secretキーが表示されます。
Settings > Developer Settings > OAuth Apps > [GitHubアプリ]
3. Retoolへの追加
Retoolで新規リソースを作成し、typeで「GitHub」を選択します。クライアントIDとシークレット・キーを入力し、承認したいアクセス許可を「Scopes」複数選択ドロップダウンから選択します。「Test OAuth integration with your own account」ボタンをクリックして、アプリケーションを承認します。完了したら「Save」を押します。
Resources > Add > GitHub

4. クエリーの作成
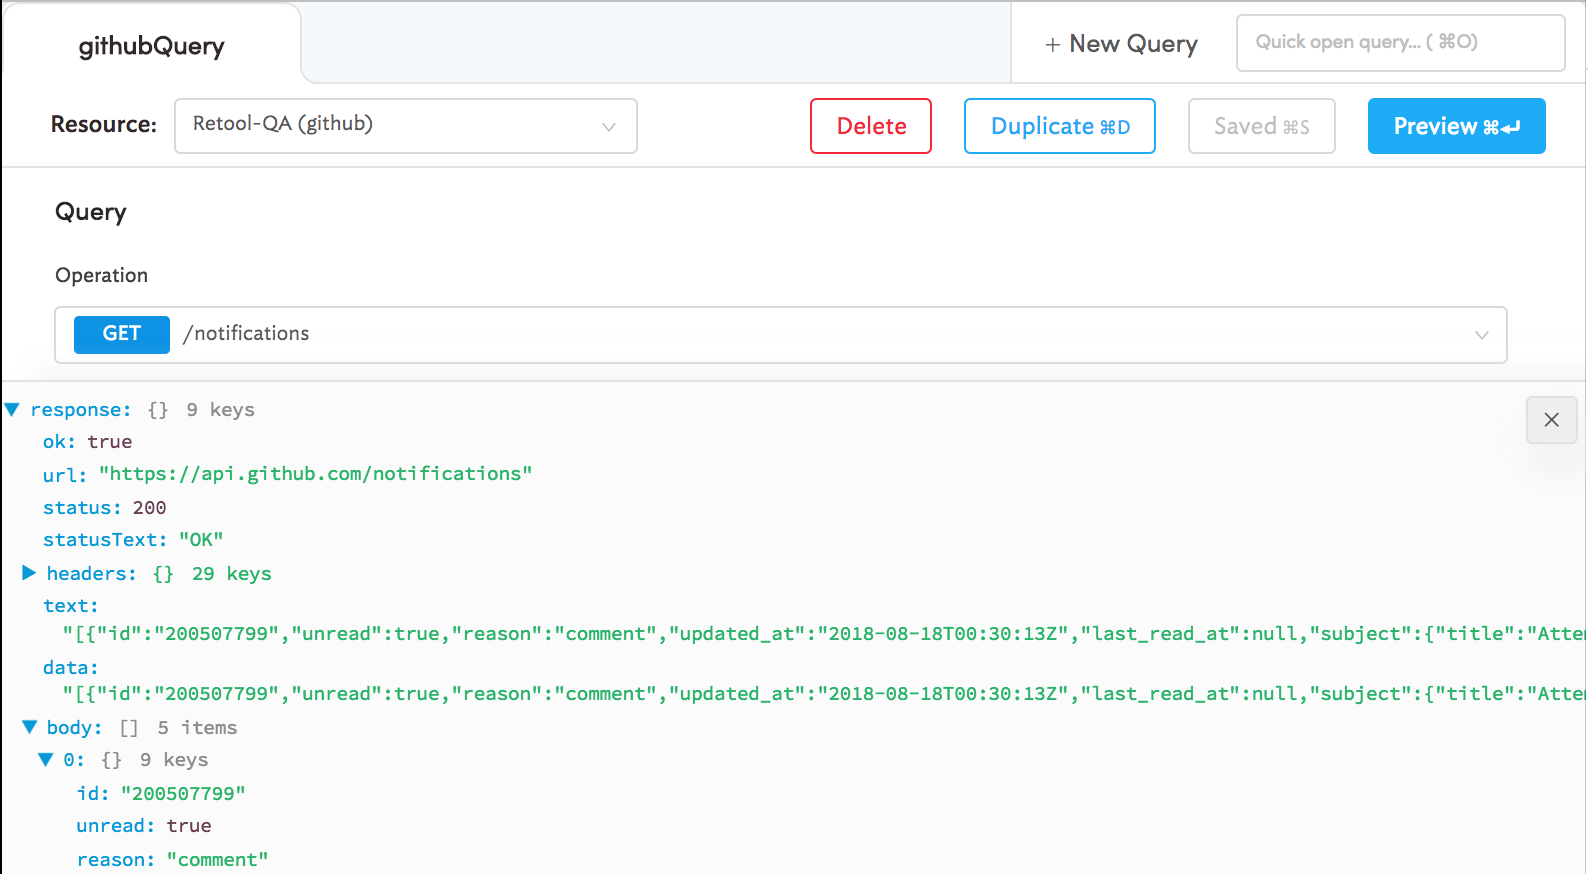
これで、Retoolアプリケーション内でクエリーを作成するときに、新規作成したGitHubのリソースをResourceドロップダウンから選択できるようになりました。リソースの設定時に承認したアクセス許可によって、利用できる操作が決まります。

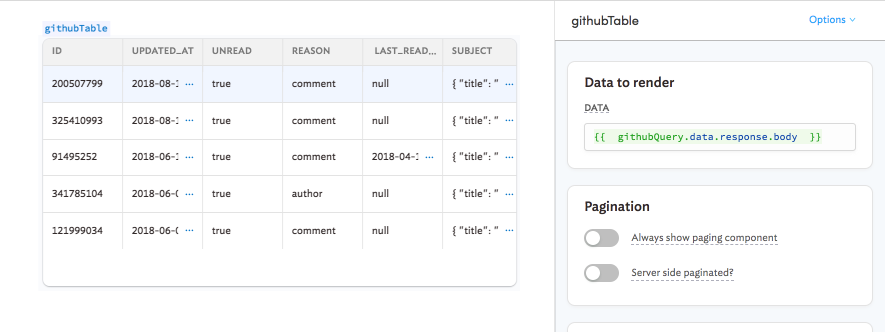
GitHubのクエリーの結果は、Retoolの他のクエリーの場合と同様に表示させることができます。実際に表示させたい部分を確認するには、レスポンスを調べる必要があります。この場合に注意するデータはgithubQuery.dataではなく、githubQuery.data.response.bodyの中のデータです。

Updated 4 months ago
